Are you having a hard time accessing a blocked site? There could be a host of contributing factors as to why you have been blocked. The two main reasons are either your government or your company has restricted access.
This implies that the inaccessible site has been banned from your IP address on purpose. I have good news for you! You can easily fix it in just a few minutes by creating a proxy server using WordPress!
Why WordPress?
WordPress is a beginner-friendly tool that is widely used by websites. As a matter of fact, more than 40% of the sites on the internet have been created using WordPress. This makes compatibility less of a struggle for users and developers alike.
It also is very accessible. WordPress has a ton of support tools and online forums to help resolve your problems fast. But aside from all of that, personal WordPress blog sites are completely free of charge! No wonder so many websites use it!
WordPress is cheap, reliable, and easy to use!
What Do Proxy Servers Do?
Proxy servers act as a gateway or middleman between you and the internet. When you’re directly connected to the internet, your information is more vulnerable. You could fall victim to phishing, data theft, and hackers, especially when accessing risky web pages.
Proxy servers hide your IP address and mask your identity on the internet. They provide none of your actual data and information to potential hackers or personal data breachers. Proxy servers give a temporary ISP for your connection as you browse so your true identity is hidden and safe.
Creating a Proxy Server using WordPress
To create a proxy server using WordPress, you must first create a self-hosted WordPress website if you don’t already have one.
I know, creating a proxy server sounds intimidating at first but don’t you worry! This step is way easier than setting up your WordPress website. What’s even better is that you have multiple options when creating a proxy server so follow the one that suits your intended use. Here are your choices:
1. By using Residential Proxies
The first way to have a proxy server is to set up your WordPress with a residential proxy provider. Their services allow you to link your WordPress site to their servers in a few clicks. Most, if not all of them, like GeoSurf, OxyLabs, Blazing SEO Residential Proxy service are compatible with WordPress.
Among the three providers mentioned above, Blazing SEO prides itself on ethically-sourced IP addresses. These IP addresses are obtained by providing transparency, building relationships, and paying compensation. This allows the company to build trust and provide clean IP addresses to users.
Here’s how to create the proxy server:
- Step 1: Visit the site of any chosen residential proxy provider
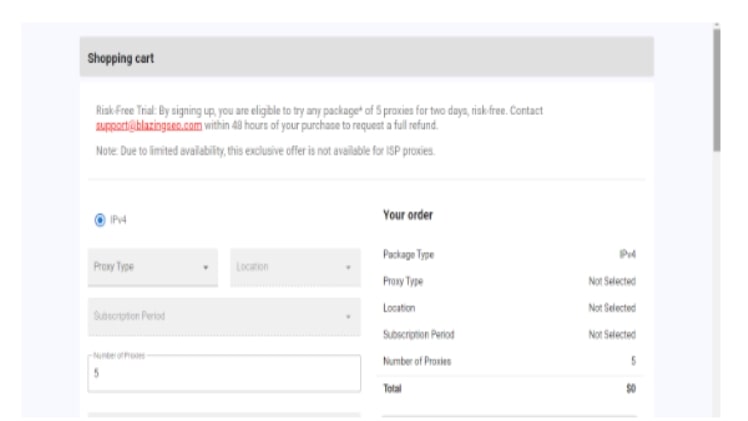
- Step 2: Take advantage of their free trial if there is one and click the button

- Step 3: Sign up to benefit from the privileges

- Step 4: Check out your cart, and a file will automatically download.
- Step 5: Log into your WordPress account
- Step 6: Click on the Plug-ins page
- Step 7: Click the upload button on the Plug-ins page
- Step 8: Choose the downloaded proxy server zip file
- Step 9: Click the install button
- Step 10: Click the Activate Plug-in button
- Step 11: Click the activated proxy server plug-in
- Step 12: Enter the Purchase code on the text box
- Step 13: Click the Register Purchase code button
It is essential to note that getting a service provider and the like are the safest options out there. These types of service providers are not only more secure and well-encrypted. but they are also very stable and more reliable to use than plug-ins and apps that might carry malware or other harmful objects onto your computer. They are also ad-free!
2. By using Built-in WordPress Plug-ins
Using plug-ins together with your self-hosted WordPress site is another way to create a proxy server. This method is the best option if you want complete control over the traces you leave on the internet. By using these plug-ins, you no longer have to reveal your internet activities to a third party. Using plug-ins is also less of a hassle since it is a given that they are already compatible with WordPress, so one less problem for you!
To add a plug-in as a proxy server, do the following:
- Step 1: Log in to your WordPress account and go to the dashboard.
- Step 2: Click the Plug-ins page
- Step 3: Type “radius” in the search bar
- Step 4: Click the first plug-in shown in the results. The plug-in name is ‘WordPress Radius Client (RADIUS Login)’
- Step 5: Click activate.
After the activation and installation, you are now free to access blocked sites using your WordPress site!
It is important to note that the said plug-in may be updated with changes from time to time. These changes can affect its performance and availability. This method isn’t recommended if you want a stable proxy server.
How to Choose the WordPress Best Proxy Server for You
We have mentioned that using WordPress is easy and free but when it comes to proxy servers, this is not always the case. Not all proxy servers are created equal so you must choose the one that suits your lifestyle best.
There are many things to consider when making the best choice. For starters, you must consider your safety, intended use, and budget. Some proxy servers for WordPress have limitations on the number of people who can use their plug-in while some might have a usage cap. Some proxy servers are free to use and others have monthly or annual subscriptions.
There may be many reasons you want to hide your IP address and access blocked websites. Still, it is of utmost importance that you consider your safety when accessing forbidden sites.

